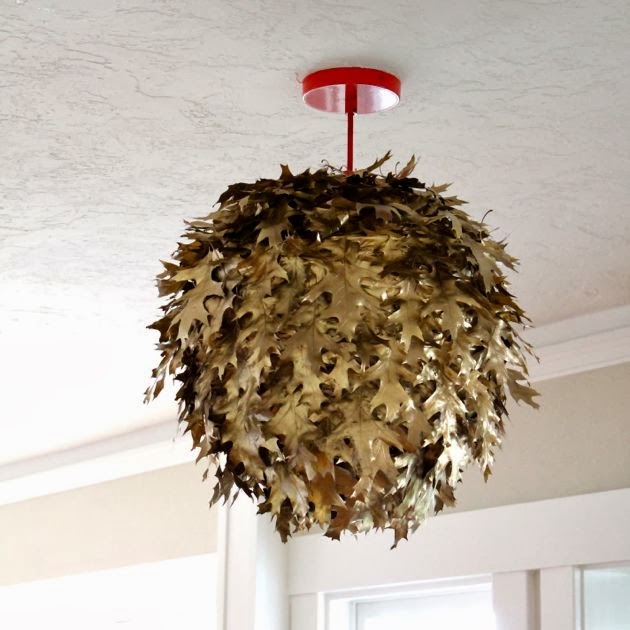
The Fallen Leaf Lantern
/
I don't know if I ever formally announced this on Poppy Haus, but I started a visual display internship with Anthropologie last month; the best part of which is the opportunity to create three dimensional art installations out of ordinary materials "as a job", because as you know, I really like doing it for my home. Today's post has been in the works and a little delayed because of my ever tightening schedule with school, interning, blogging and kid wrangling. I am very excited to share this new paper lantern project, particularly because it's a project that you can do with kids, at least the leaf collecting part (we got our leaves from Jasper's school). The lantern can hang from a string or can be illuminated with a light cord. Here are some more pictures and a tutorial.

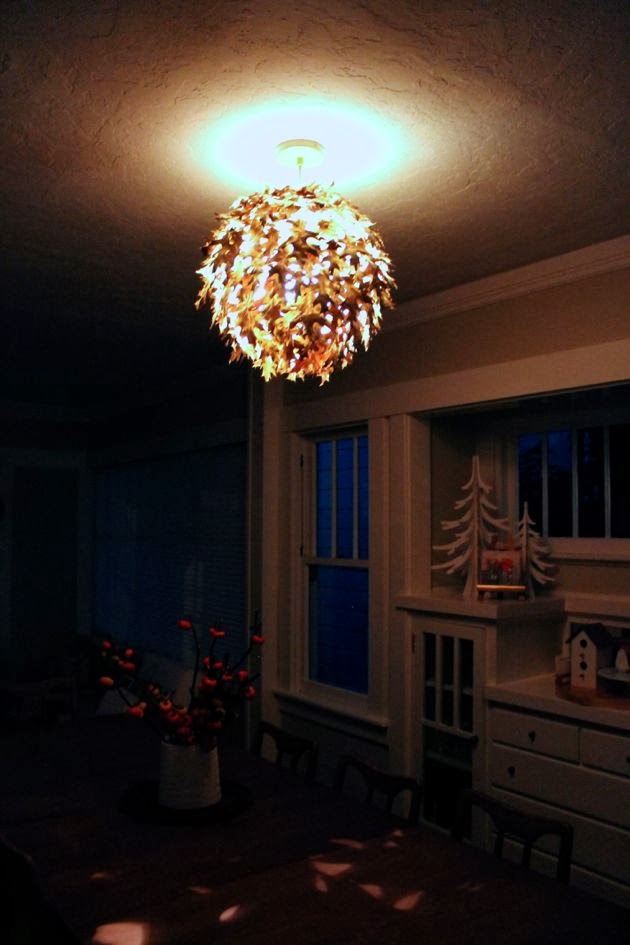
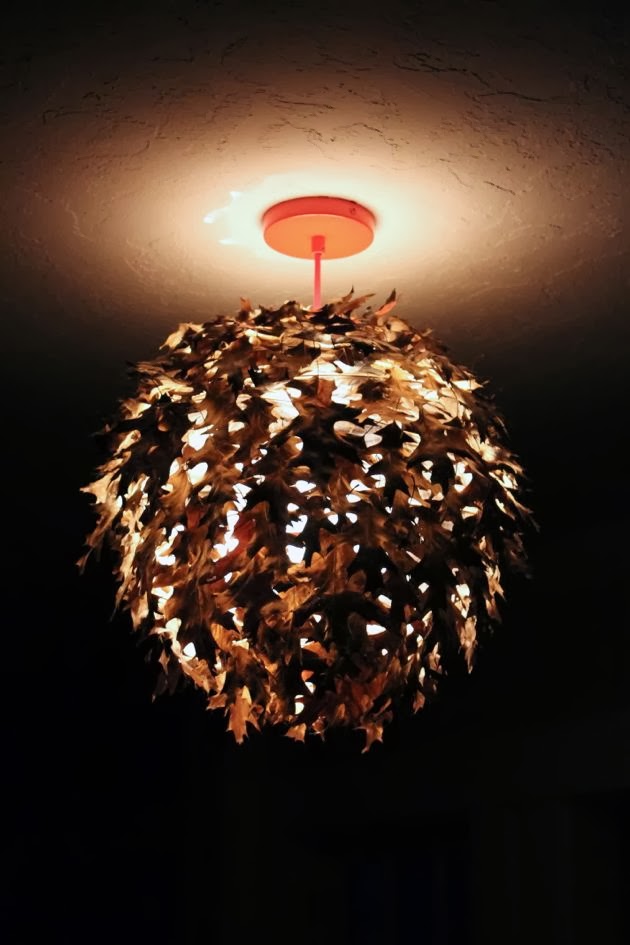
When illuminated, the lantern creates a dim, ambient light a bit like candlelight.
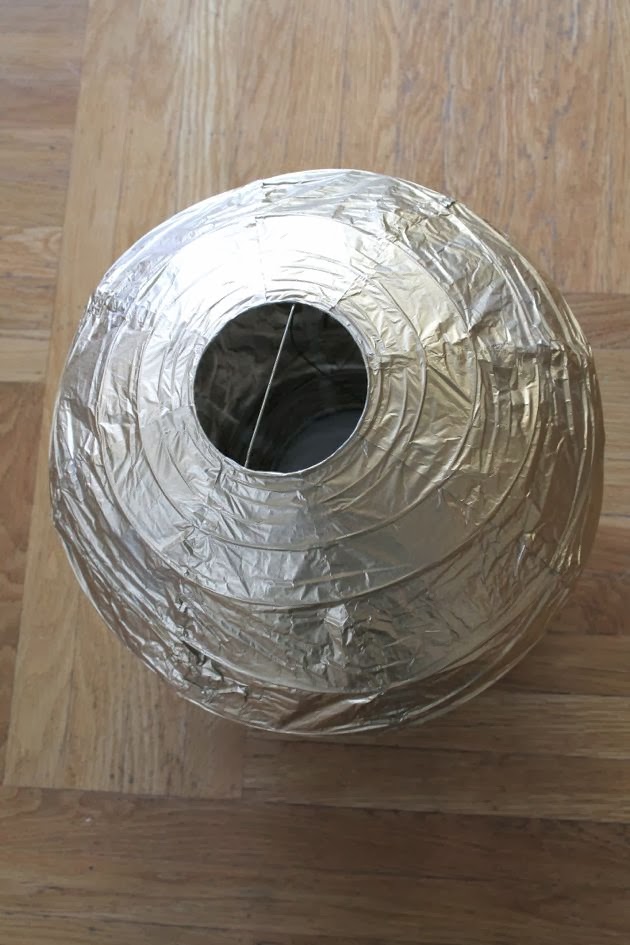
To make your own, you'll need a rice paper lantern (this one is 14") a paper grocery bag full of intact,fallen leaves (completely dry), metallic gold spray paint, and hot glue.
The first step is to spray paint the lantern gold in two, light applications.
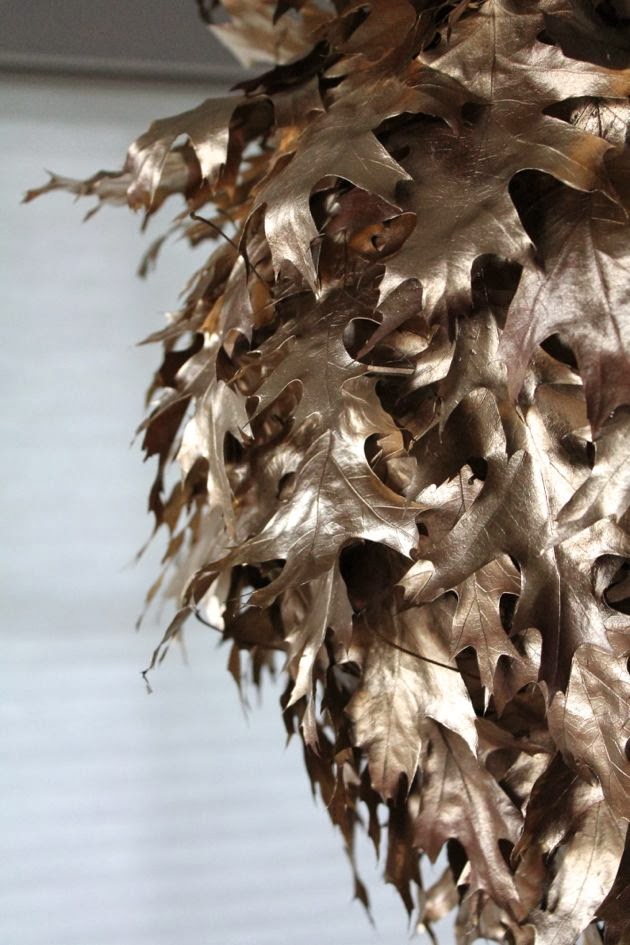
Next, spray paint the leaves gold, front and back. Allow to dry completely.

Begin assembly by turning the lantern upside down and starting from the base, hot glue a the leaves around the opening, stems pointing up toward the top. Slightly overlap the edges of the leaves to create movement.

Continue layering the leaves in circles around the lantern until reaching the top opening. The stems should gather pointing toward the metal hanging piece at the opening.
Hang from a gold thread, rope, or from a light cord to illuminate the lantern.